Tuesday, May 31, 2011

Treasure Island Flea (Market)


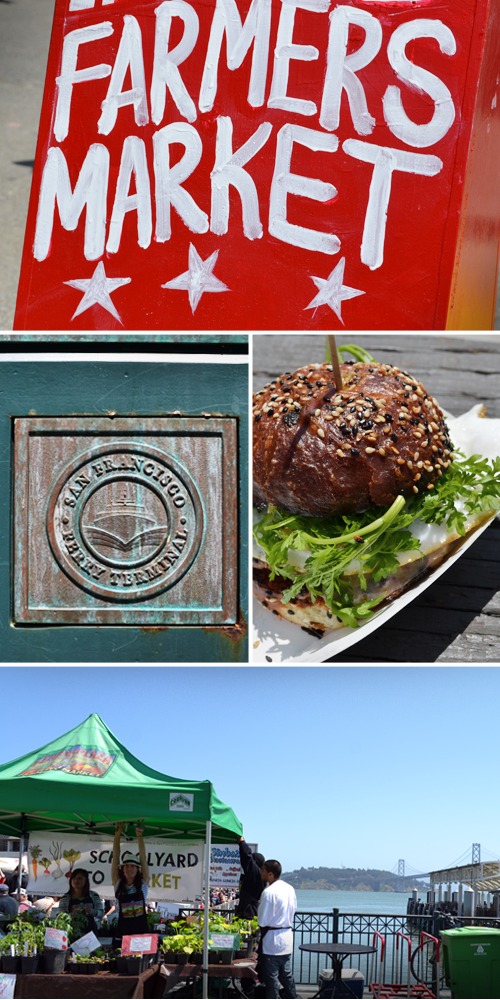
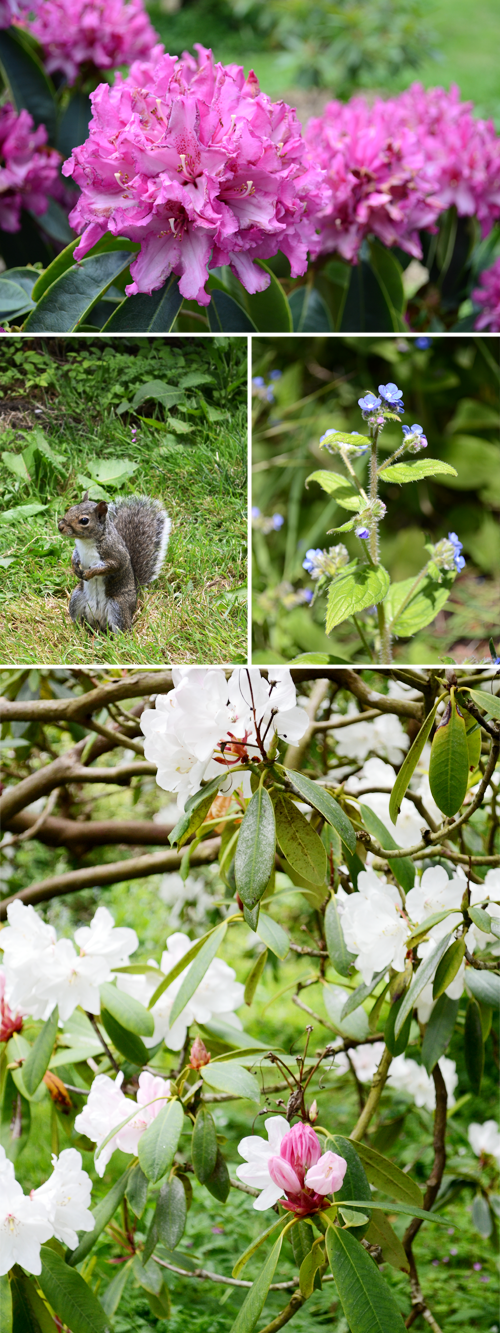
A brand new flea market opened over the weekend on Treasure Island. Despite living in the Bay Area for several years, I'd never actually been to Treasure Island so I thought this would be a great reason to check it out. Treasure Island Flea is on the Avenue of the Palms, right on the western edge of Treasure Island where you can see all of downtown San Francisco and both bridges. Despite the chilly breeze causing some problems for vendors, it was a beautiful setting for a flea market.

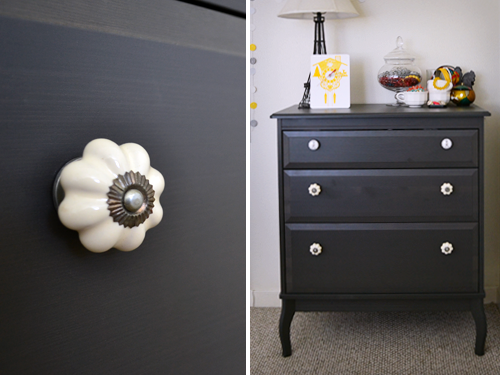
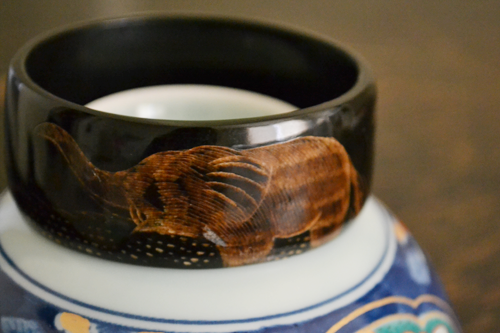
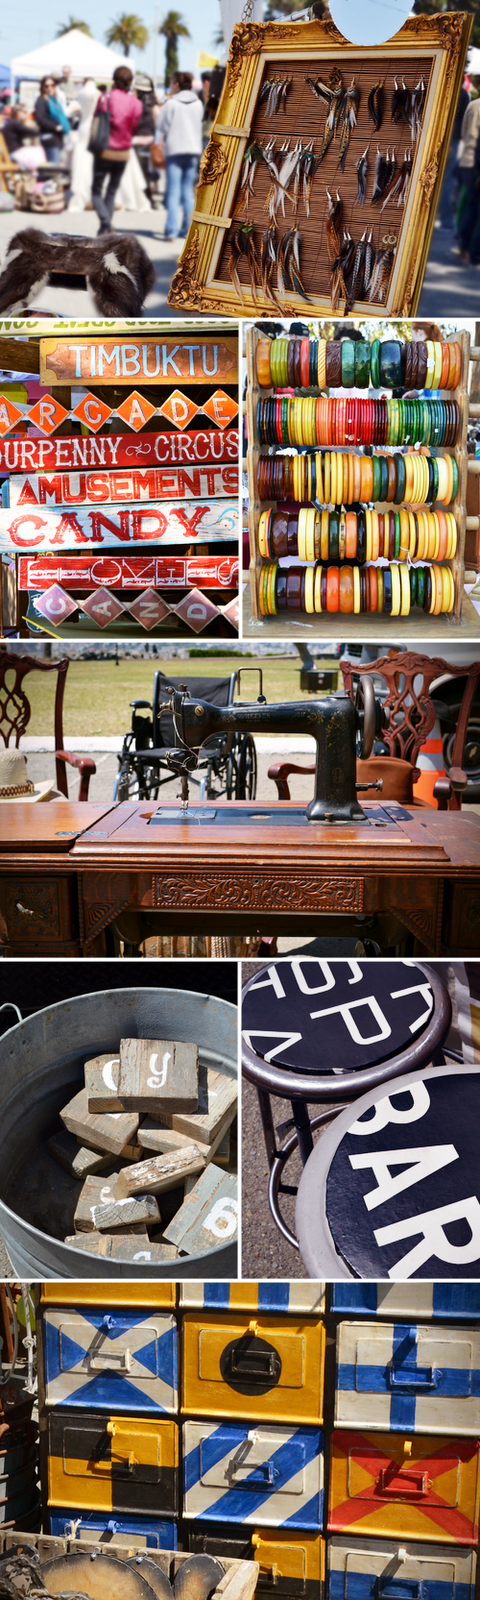
The flea market was relatively small but I imagine that more vendors will join in when people get a better feel of it. There were a few jewelry booths, some vintage lettering and botanical prints, and some interesting collections of antique furniture. I was looking to get a hodge podge of antique dishes but there unfortunately wasn't anything like that. It was nice that every vendor booth was completely unique and carried different stuff from the others, but overall there was a lack of the little knick-knack and treasure bins that I'd expect to rummage through at a flea market. Another downside was that it cost $3 just to get in which, to me, takes away a little from the trifting adventure that a flea market is supposed to be.

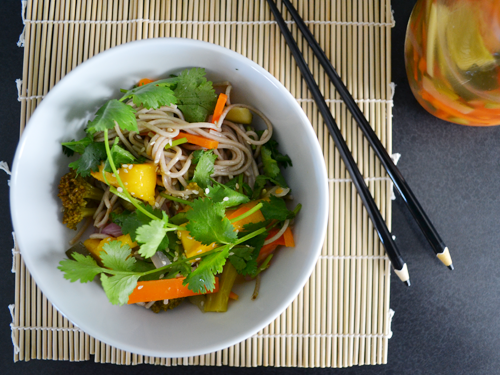
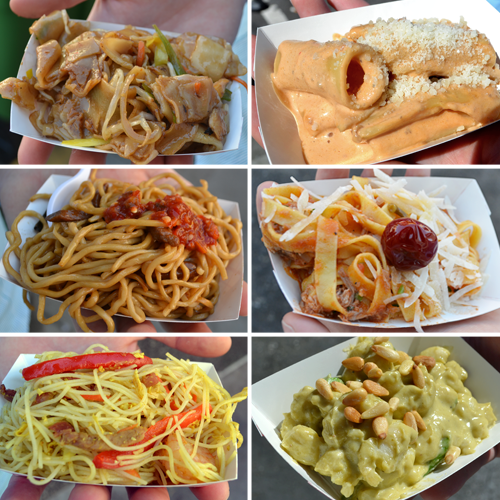
Snacking from the food booths and the amazing views of the city made the trip out to Treasure Island still worthwhile for me. The venue has such amazing potential (it's literally just a few yards away from the water) that I really do hope Treasure Island Flea will grow into a cool place to go antiquing. The flea market will take place on the last weekend of every month hereafter, but I think I'll wait a few months before returning to see if more vendors get added to the lineup.

| Photo Credit: Me. |

Friday, May 27, 2011

Weekender Bags That Don't Look Like Gym Bags

Nick was out of town on a business trip for a couple of days but before he left, he tasked me to look for a new weekender bag for him. His one stipulation was that "it not look like a gym bag" because our current bag for overnight trips is an embarrassing blue vinyl duffel bag. I know I never do enough manly posts here, so instead of bookmarking a bunch of bags I decided to put my favorite finds in a composite that I could show to Nick later (some within budget and some not so much). In the cases of large bags and totes, I often prefer the look of masculine bags myself; I'm especially drawn to soft-looking warm brown leathers, contrasting handles, bold white + color stripes, and brass hardware.

| 1. Bally, Terret Bag | 2. Ossington, Houston Duffel Bag | 3. Cole Haan, Handpainted Aviator Duffel | 4. Mulholland Brothers, Hippo Duffel Medium Weekend Bag | 5. Coach, Op Art Coated Canvas Boston Bag | 6. OBEY, Uptown Duffle |

What are other features that savvy guys look for in weekender bags?

| Photo Credit: 1–6. See links provided. |

Thursday, May 26, 2011

The Modern Kraft

I took this photo of jars of peanut brittle at my awesome neighborhood ice cream shop, Mr. and Mrs. Miscellaneous. I love the hot pink roses in the background. But I am also drawn to the handwritten, kraft paper labels on the jars of peanut brittle. Kraft paper is paper that is made from pulp, giving it a subtle texture, and nowadays it is made from recycled materials. It's the kind of paper used to make brown paper grocery bags. In the crafting world, I think it's been used in the past for a faux-vintage look, since the paper looks aged, but I've noticed a trend lately towards using kraft paper in more modern presentations like business cards, invitations with sans-serif typefaces, and as eco-friendly gift-wrap. The use of kraft paper in these cases comes off as fresh rather than contrived.

Here are some neat ways to incorporate the kraft paper look into your life. My favorite, though, is the leather bag that is designed to look like a brown paper bag—such a cool take on a classic.

| 1. Ink Whimsy, Hello Flat Notecard | 2. Knot & Bow, Kraft Wafer Seal Stickers | 3. Anve, Saco de Papel | 4. Moleskine, Cahier Notebooks |

| Photo Credit: top. Me; 1–4. See links provided. |

Wednesday, May 25, 2011

Ferry Plaza Farmers Market


I thought it was silly that I had written about the farmers markets in London and Paris but I hadn't even written about any of the farmers markets in the city that I actually live in. San Francisco has a bunch of farmers markets scattered throughout the week and throughout the city. Last Saturday, I went to the one that wraps around the Ferry Building, which is not at all a bad setting for an outdoor market. The Ferry Plaza Farmers Market has a good number of hot food stalls in addition to produce and flowers, and they even set up tables overlooking the bay for you to sit and eat. Some of the food stalls, like Blue Bottle Coffee and Hog Island Oyster Co., have spaces inside the Ferry Building, while others are street-food-style vendors, like 4505 Meats where I got my tasty, juicy breakfast sandwich shown below.

Something that was a bit of a bummer at this farmers market compared to my experiences abroad was that the presentation of the fruits and veggies wasn't quite at lovely as what I'd seen in London and Paris, where produce was displayed in cute baskets and really packed into stalls to look beautiful and abundant. I've noticed, in general, that presentation is kept more casual at the outdoor markets I've been to in California. But one thing that I did think was neat and unique about the Ferry Plaza Farmers Market was the Veggie Valet service that they offer for free on Saturdays. If you get there early to snag the freshest produce but want to spend the mid-day exploring the Ferry Building and the food stalls, there is a free service where you can drop off your farmers market purchases and they will be kept safely in the shade for the duration of the market. This is pretty handy since the market does get crowded and you don't want your lettuce to get crushed.

I don't know why but I am always drawn to outdoor markets like these. I think I like seeing what's being grown and jarred locally, and I've definitely been drawn into the street food craze. What is unique about the outdoor/farmers markets in your city? Which ones are worth visiting?

| Photo Credit: Me. |

Tuesday, May 24, 2011

Making Pom-Poms Across the Pond

Instead of a regular posting here today, I'm being featured as a guest on the UK-based blog Wedding Sparrow. I put together this photo DIY tutorial for Sara, who runs the blog for the wedding-obsessed. You can check out the full post, with instructions for how to make the tissue paper pom-poms, here.

Thank you, Sara, for inviting me onto your blog.

If you see a project or recipe here that you would like for me to expand into a guest post for your site, email me at theyuppielifestyle@gmail.com.

Updated on 06|10|11: A few people have commented on the gold-striped tissue paper that I used. It came as part of the packaging when I bought something from Kate Spade!

| Photo Credit: Me. |

Monday, May 23, 2011

A Piece of Doctor Who for Your Dresser

I consider myself a big Anglophile and a big nerd, so of course I am a huge fan of the British science fiction television program, Doctor Who. For those of you who are unfamiliar, Doctor Who is about a sexy alien man who travels through time and space, typically saving the universe but breaking hearts of impressionable young women along the way. They've really tried to spice it up lately with younger actors and cuter outfits, but the sad part is that Nick and I became devoted fans back when it was really really bad Welsh CGI and not a whole lot of production value.

Don't ask me how I noticed this because it is pretty geeky and embarrassing. If you take a look at this still from the "A Christmas Carol" episode, you can see that there are a bunch of pretty, pseudo-Dickensian white knobs on the cloud-controlling switchboards to each side of Matt Smith.

Now, I can't say for certain where the set designers got them, but these knobs look an awful lot like the Ceramic Melon Knobs from Anthropologie. I recognized them immediately because I happen to have them. Anthropologie sells beautiful knobs that are great for sprucing up Ikea dressers, which I have done with mine.

So, if you are a Doctor Who fan wishing to pretend that you have a piece of Doctor Who without going to the extremes of this or this, you're welcome.

| Photo Credit: top. Still taken from this BBC America clip; bottom. Me. |

Friday, May 20, 2011

Happy Weekend and Hello!

This month has been awesome so far for The Yuppie Lifestyle. Many new readers have been sent my way through my feature on 100 Layer Cake, which is really cool, and several of you have even dropped me personal notes to say how much you enjoyed the tutorial and this blog, which just makes my inbox feel filled with joy. I thought this would be a good time to re-introduce this blog and also explain the name.

I started this blog back in 2007 as an old-school journaling sort of blog. It had hardly any photos and its inside jokes were not very entertaining for anyone but myself and a few friends. So, in October of 2010, I scrapped everything and started over, keeping the same name but building a new blog to share the things that I love—things like food, style, themed collections, and crafts. It says "beta" in the header because I feel that it allows me to change things on this blog as I grow. (And because I'm a nerd.)

The "yuppie lifestyle", to me, has nothing to do with money or class. Yes, I do consider myself young, I do live in an urban area, and I can be professional (sometimes). But on this blog, the yuppie lifestyle is one where I encourage you to do what makes you feel youthful, find delight in wherever it is you live, and become a pro at being awesome. By this definition, anyone can live the yuppie lifestyle. I'm just trying to be a good example.

And now, here is a photo of me, so you know that I am not just a cartoon character or an anonymous voice on the internet! (Nick is in it, too. I mention him sometimes.)

And because this is a lifestyle blog, if you enjoy what you read here and think my style jives with yours, I encourage you to check out the other aspects of my daily life that I share on these other social networking sites:
  • Like this blog on Facebook to get blog updates and coupon codes!
  • Follow me on Twitter where I attempt to use shorter sentences!
  • Follow me on Pinterest where I keep track of things I think are cool/pretty!
  • Become my friend on Last.FM to see my embarrassing taste in music!
  • Add this blog to your Google Reader, which I don't actually know how to use!
(Links to all of these are in the right sidebar as well.)

If there's anything you'd like to ask about that I didn't cover, or you just feel like expressing your own opinion, always always feel free to comment. Or, you can send me an email because I ♥ email.

| Photo Credit: Aubrey Trinnaman. |

Thursday, May 19, 2011

Recipe: Soba Noodles with Pickled Salad

Nick is always trying to get me to make Asian food, but by that, he doesn't mean the traditional Chinese vegetable dishes I dreaded growing up; he means taking the Asian flavors and spices that he likes and inventing an Asian-inspired dish that is neither Panda Express nor a plate of steamed choy sum. Here is one of the dishes I'm particularly proud of inventing because not only is it healthy but it is pretty, too. Which makes it taste even better.

Ingredients
| for the pickled salad |
1/4 red onion
10–15 broccoli florettes
1 cucumber
1 carrot
1 jalapeño
1 1/2 cups white vinegar
1/4 cup sugar
2 teaspoons salt
water
| for the soba |
2 bundles of soba
1 mango
1 small handful of cilantro
1/2 teaspoon plum sauce
1/2 teaspoon hoisin sauce
1 teaspoon fish sauce
1 tablespoon pickling liquid
1/2 teaspoon white pepper
sesame seeds (optional)

Directions
Fill your pickling jar halfway with water and pour the water into a saucepan. Set the jar and the saucepan aside.

Cut your veggies and onion into bite-sized pieces and seed and chop your jalapeño. I very quickly blanched these ingredients by boiling some water, throwing them in for a few seconds, and then rinsing them with cold water. You don't have to do this, but I prefer mine slightly less crunchy than the average pickle. When your veggies are ready for pickling, put them in your pickling jar.

Bring the water in the saucepan, along with the vinegar, sugar, and salt, to a boil. Pour the liquid into the jar and let cool before putting on the lid and putting the jar in the fridge. Let the salad pickle away for at least two hours before serving.

When it is time to prepare the soba, cook the noodles according to the package instructions. Thoroughly wash the noodles in cold water after cooking. (This is an important step for soba preparation that is not always on the package!) Whisk together the liquids/sauces and the white pepper and toss the dressing together with the soba noodles in a large bowl.

Cut the mango into bite-sized pieces and roughly chop the cilantro. Just before serving, scoop out half of the pickled salad with a slotted spoon and add it to the bowl of noodles. Add the mango and the cilantro and give everything a quick toss. Garnish with sesame seeds and serve. Use the remaining half of the pickled veggies for Vietnamese bánh mì or for a fun snack.

Makes 1 large jar of pickled salad and 2 servings of soba.

P.S. My awesome chopsticks, shown above, are from the MOMA but are sadly no longer available.

| Photo Credit: Me. |

Wednesday, May 18, 2011

Tut-Tut, It Looks Like Summer Rain

We had some random rainy weather here in San Francisco, just when I thought summer was on its way. I think this is pretty lame because I love sunny skies. Some people argue that summer is actually the coldest part of the year here in San Francisco because of the heavy fog that we get in the mornings and evenings, but I happen to live in the Potrero Hill neighborhood, where it is always sunnier than the rest of the city. Lifestyle Tip: If you're thinking of moving to San Francisco but are concerned about the cold and fog, move to the Potrero/Dogpatch area where it always feels about 10 degrees warmer than Golden Gate Park on the other side of town.

While lamenting about how gloomy it was outside, I came across this print by photographer Sarah Illenberger. It's called "Meloncholie" and I think it is the best way to picture summer rain.
If you, too, are feeling meloncholy about the summer rain, here are some cute and summery rain-themed things to help charm the clouds away.

| 1. Kate Spade, Kate Spade Umbrella | 2. Blanca Gómez, Monsieur I Print | 3. Zakka Nouveau, London Fog Tea Towel | 4. Joules, Millie Wellies |

| Photo Credit: See links provided. |

Tuesday, May 17, 2011

Simple Cupcake and Fringe Flag Card

Here is a card I made for my friend Jess for her birthday last month. This was a pretty different route for me because I usually make cards that involve a lot of straight lines and precise planning. This time I tried to do something simple and cute, so I cut a trapezoid and a dome out of some cardstock, and then freehanded the lines on the trapezoid with a gel pen to make an abstract cupcake wrapper.

To make the fringe-y flag, I first snipped off the ends of a toothpick. Gluing a small cylindrical object onto a piece of paper without the glue showing can be tricky. I cut a little flag shape out of cardstock and glued it onto the card as the base for the flag part. I then used a hot glue gun to sturdily secure the toothpick flag pole to the flag base. (So, the toothpick is only glued down on one end, but I used a decent amount of hot glue.) I cut several small strips of tissue paper and using roll-on adhesive, glued them down on just one end so that they covered the lump of hot glue. The strips don't need to line up perfectly or even be the same color; I used a combination of white and turquoise. Once I felt I had enough layers of tissue paper, I snipped a little wedge out of the free ends of the flag and then made little cuts to create the fringe.

| Photo Credit: Me. |

Monday, May 16, 2011

Rhododendrons in Golden Gate Park

The 100th running of San Francisco's famous Bay to Breakers took place yesterday. And while I am not at all one for running/walking long distances, drinking cheap beer in the streets before noon, or dressing in furry animal costumes, I felt compelled by my San Francisco pride to at least spectate some portion of the event. So, my alternate Bay to Breakers Day itinerary involved packing up a couple cheeses, some finely-sliced salami, and a bottle of Pellegrino and having a picnic overlooking the Music Concourse at Golden Gate Park, where we were able to admire some of the costumes of the participants and party goers who passed by.

While seeking refuge from the cold wind, I happened upon a little treasure—the John McLaren Memorial Rhododendron Dell. Here are some photos I took of this pretty section of the park.

I think this is a much lesser-known garden within Golden Gate Park because it's not even mentioned in the Wikipedia article about John McLaren, despite the garden being a memorial for the first superintendent of the park and his large role in developing it. Undisturbed by the Bay to Breakers event, it was quiet, with lots of open benches, winding paths, and blossoming bushes. The best part about it for me was that the trees that helped seclude the space also did a nice job of blocking out the cold wind that was blowing that afternoon. There is a main entrance off JFK Drive, but I found it much more charming when I entered by the small hidden path behind the Goethe-Schiller statue, where the entrance to the rhododendron dell is marked by a faded, carved wooden sign.

| Photo Credit: Me. |

Saturday, May 14, 2011

Today's Flavor: Think of an Elephant

I get lazy about wearing bracelets when it's chilly out because they tend to get at odds with the ends of my sleeves, but now that it feels like summer is on its way, I have been busting them out again. My aunt got me this bracelet ages ago in Thailand and I love that it has hand-carved elephants on it. There is something about wearing a dainty piece of jewelry with an elephant on it that feels fun and silly because elephants are not dainty creatures at all.

When I visited Thailand, I looked all over for this kind of bracelet and couldn't find anything close. So here are some other fun ways to incorporate the whimsy of tiny little elephants in your life.


| 1. Salvatore Ferragamo, Marine Monkey and Elephant Print Silk Tie | 2. Decoylab, Modern Baby Elephant Clock | 3. Forever 21, Metallic Elephant Wooden Bangle | 4. Target, Zoology Elephant Teapot | 5. Jonathan Adler, Utopia Elephant Lamp | 6. Svenskt Tenn, Elefant Handbag |

Bonus photo: Here I am (circa 2008) on a beach, riding bareback on an elephant. Because I am hardcore like that.

| Photo Credit: top. Me; 1–5. See links provided; bottom. Photo taken by the elephant keeper. |

Wednesday, May 11, 2011

Recipe: Banana-Flambé-Topped French Toast

Subtitled: Cooking with Fire. Because Brunch Is So Hot Right Now.

Nick loves French toast and it is hard for me to see why because no matter what you do, it's still going to be just eggy bread. My way of trying to jazz up French toast, though, is with banana flambé. I'm not going to go into the details of the French-toast-making part of this recipe, because I am still perfecting my technique in that regard and the banana flambé topping will work with whatever French toast technique is currently successful for you. However, I do need to provide a cautionary note that individuals with bushy eyebrows or a very cluttered kitchen may want to think twice before trying out this recipe.

Ingredients
1 firm banana (That's what she said.)
2–3 tablespoons butter
1/4 cup dark brown sugar
1 teaspoon cinnamon
1/4 cup spiced rum
1 serving of French toast
1/2 teaspoon powdered sugar (optional)

Special Equipment
gas stove or grill lighter

Directions
Slice your banana as desired. Using a banana that is slightly under-ripe is better than using an overly-ripe banana, which may lead to mushy disaster.

In a small pan on high heat, melt the butter all the way. Add the banana slices, toss to coat, and turn the heat down to medium. Add the brown sugar and cinnamon and gently stir the melted butter and the sugar together until they have become fully incorporated and the sugar has dissolved.

Turn the heat back on to high. Pour the rum on top and 1) if you are using a gas stove, quickly tilt the pan towards the flame to ignite, or 2) set the rum ablaze with your lighter. Be sure to do this with great caution, as a tower of flames will suddenly burst from the pan. Shake the pan gently until the flames die down, give everything a little stir, and pour the banana flambé over your French toast. Dust a little powdered sugar on top for maximum presentation points and serve immediately.

Makes 1 serving.

I've also won many hearts in the past making banana flambé as a topping for vanilla ice cream; I would suggest that you up the butter amount a little bit there because you aren't getting the additional butter flavor from the French toast and the mix of butter and caramelized sugar hardening when it hits the cold ice cream is magical.

| Photo Credit: Me. |

Tuesday, May 10, 2011

How to Get Great Fresh Pizza Dough

If you have a pizza stone, there are a lot of advantages to making pizza at home. You can make it as large or small as you'd like, you can pile on the toppings without having to pay the price of a tall latte for each one, and it is a great way to use up the random cheese and produce remnants lying around in your fridge. Assembling a topping buffet and throwing a make-you-own-pizza party is also an easy way to get food going for a group without having to spend all day in the kitchen.

The other day I learned a neat trick that will get you a great fresh pizza dough in a snap. Here's how.

  1. Go to your local Whole Foods store.
  2. Go to the counter where they sell freshly baked pizzas by the slice.
  3. Smile at the staff members running the pizza counter.
  4. Ask them if they wouldn't mind bagging you a ball of dough.

The way I learned this trick was a little different, however. I first checked in all the refrigerated pizza sections and then asked someone who was stocking the eggs for help, and he returned with a bag of dough which he said he got from the pizza people. The dough he handed me was soft and almost warm, as if it had just been removed from a warm spot after the yeast had risen. They even took care to throw a splash of olive oil in the bag before adding the dough so that the dough would not stick to the bag. Also, it was only $1.29 for 11 ounces, which to me felt like I was almost robbing the person who had put the labor into making such a beautiful dough and who had saved me at least two hours of my life. I took my bag of dough home and when I opened it, it still smelled of fresh yeast but even better, because it was yeast that I didn't have to wait on.

As far as I am concerned, it still totally counts as homemade pizza if you get the fresh dough this way, stretch it out yourself, and top it and bake it in your own home.

Unrelated: My paper ribbon flag tutorial was featured on 100 Layer Cake yesterday. A big thank you to the lovely ladies running that site!

| Photo Credit: Me. |

Monday, May 9, 2011

I Sell Things On Etsy Now

My Etsy shop is finally up and running after some major procrastination on my part. You can check it out right here.

I've been meaning to offer custom digital portraits for awhile, at the encouragement of a few awesome friends whom I made buddy icons for a while back. You've also seen some sneak previews recently in my posts about my wedding stationery. If you're looking for a cute way to commemorate some awesome outfits, want art to use for your wedding postage, or are just really narcissistic, holler at me on Etsy for a custom digital portrait.

Setting up a shop on Etsy was harder than I had expected. The instructions they give you are a little too general and vague, especially since I find that many people on there who are talented with handmade crafts may not necessarily be the best with technology. PayPal is the standard way to handle payments, yet there are no clear instructions on what needs to be set up on the PayPal end verses the Etsy end, and the PayPal user interface is terrible. After stuff gets rolling in my shop, I'll probably try to post some clearer instructions to help people who are trying to set up a new shop. At least the buying process is straightforward!

| Art Credit: Me. |

Friday, May 6, 2011

How to Make Paper Ribbon Flags

Like everyone else, I am digging the new decor line from BHLDN (a.k.a. Anthropologie for weddings) that launched yesterday. There are lots of beautiful pieces that aren't just for weddings and can be used for everyday cheer as well. If you, like me, are lusting after cute little party supplies but can't really justify ordering them, here's a photo DIY tutorial I put together for how to make their Ribbon-Tailed Pennants (shown on the left, with my version shown on the right).

Making these is so easy that I can hammer out a whole batch of them in the time it would take me to enter in all of my info to place an online order. All you need are some wooden skewers and half-inch-wide strips of paper. I used some construction paper and colored printer paper I had lying around, but you can use any paper that is lighter than cardstock; since I started off with letter-sized sheets, my strips were 8.5 inches long and I trimmed the ends a little once the flag was assembled.

You can also cut the pointy tips off of the skewers for added safety or to match the ones from BHLDN, but I left them on because it would be easier to stick the flags into cakes and other treats that way. Because they cost pennies to make, you can put them together for occasions big and small. Stick a few of these in a stack of waffles to add some festiveness to a Mother's Day breakfast, write names on the flags and use them as placecards, or make one to cheer on a friend studying for finals.

| Photo Credit: top-left. See link provided; top-right & others. Me. |

Thursday, May 5, 2011

This Season's Nail Color and My Neighborhood Nail Salon

Right now I am really loving the nail color that my manicurist helped me pick out. I'm wearing Essie's Tangerine polish, but it looks more like a hot salmon color in real life than it does the color of an actual tangerine. I think this is the perfect color for the warm summery weather we've been having around here lately and it really says happy times to me. Since I have been admiring my nails a lot recently I thought this would be a good opportunity to give a shout-out to La Fleur, the nail salon I frequent here in Potrero Hill.

La Fleur is much more of a neighborhood salon than a spa. There are even a couple of special children's pedicure chairs in the back with fairy wings on them. And instead of tranquil babbling brook sounds, there's always a soft rock radio station playing that allows me to flashback to my CD collection from the 90s as I get my nails done. The first time I went was when I wanted to treat myself and Nick to mani-pedis just after we finished moving into our place in Potrero. It happened to be the second day that the owners (a sweet married couple named Lin and Tam—sorry if I misspelled the names!) had been running the place, but there was absolutely no sense of new-management chaos and I have been going there ever since. During my second visit, I got "Hey, you look familiar, I remember the last time you were here" and by my third visit the owners were greeting me by name when I walked in the door. They even wave to me through the windows on other days when I am waiting for the 10 bus that stops right outside.

Having La Fleur a walking distance from where I live is great because the prices are the lowest I have seen for such a quality place. Manicures are only $12. At La Fleur, for this low price, they meticulously cut and shape my nails exactly the way I want them, the polish lasts a considerable amount of time, and they give super relaxing massages. I always find myself struggling not to fall asleep because they are so relaxing. Because of the incredibly thorough job they do there, this is not the place to pop in and out if you want a quick nail trim. Tam and Thuy will continuously scrutinize the shape of my nails as they file to make sure they are all even and perfect.

I strongly recommend La Fleur as a nail salon. If you're planning to check it out, note that it's easy to walk in and be tended to immediately on weekdays but an appointment on weekends is advisable. They take credit cards but appreciate if you use cash for tips if possible.

La Fleur Beauty Spa and Salon is located at 1701 20th Street, San Francisco, California 94107.

| Photo Credit: Me. |

Wednesday, May 4, 2011

Recipe: Mango-Jalapeño Chutney

A little while back, I sampled some of these Pepperlane preserves at my local Whole Foods. I really liked the idea of a sweet and spicy jam but I wasn't quite willing to pay $9 for a small bottle of jam from a grocery store, so I decided to make my own. It turned out sweet with just a little bit of kick in the finish; I would imagine you could add more peppers if you prefer something more spicy. I'm calling this a chutney because it is more of a thick sauce than it is gelatinous, but I would imagine that if you added a little bit of pectin, you could turn it into a jam with a longer shelf life.

Ingredients
1 large mango (I used the green and red kind from Mexico)
1 green jalapeño pepper
1 cup water
3/4 cup sugar

Directions
Slice open the jalapeño and remove the stem and seeds. Finely dice the jalapeño. Cut the flesh of the mango into small cubes. (I found this video to be pretty helpful.)

Add 1 cup of water and the jalapeño to a small saucepan and bring the ingredients to a boil on high. Turn the heat down to medium-low. Add the sugar and stir until dissolved. Add the mango, stir, and let the mixture simmer uncovered. Stir occasionally as the sauce thickens. Simmer until the mango is soft and the little liquid remaining has been reduced to a very thick syrup. Crush some of the mango with the back of a spoon, if desired, to achieve a more sauce-like consistency.

Makes about 1 cup.

| Photo Credit: Me. |

Tuesday, May 3, 2011

A San Francisco Treat at Anthropologie

I think at this point it has been firmly established that I love San Francisco. And those who have experienced shopping excursions with me also know that I love Anthropologie. While Anthropologie is indeed one of my favorite stores, I tend to find their decorative displays a little too avant-garde for my case. But I was very excited to see this San Francisco-themed display over the weekend at the San Francisco Anthropologie store on Market Street.

It's the Golden Gate Bridge and the San Francisco skyline, built out of Rice-A-Roni boxes! Unfortunately there is a giant pole in the middle if you are looking at the display from the angle that it was meant to be viewed, so this terrible photo does not capture the Rice-A-Roni skyline. But I think this is the coolest odd Anthropologie display I've seen in the store and I am stoked by the quirky way that they worked San Francisco pride into it. I just hope that some poor intern did not have to consume all that Rice-A-Roni in order to make the display.

Here are some of the things I'm currently loving at Anthropologie; these would be perfect for enjoying a lovely, warm day by the bay.

| left. Moulinette Soeurs, Diamond Lattice Dress | middle. Jeweled Honey Earrings | right. Handcarved Iced Tea Spoons |

| Photo Credit: top. Me; bottom. See links provided. |

Monday, May 2, 2011

Noodle Fest 2011

With 2011 as its second year, the Chinatown and North Beach Noodle Fest is pretty new as far as SF festivals go. It has special appeal to me and Nick though, because it is a bridging of Chinese and Italian cultures (like our marriage). For a $20 ticket, you get a beverage sample and 3 food samples from each neighborhood. The samples are decently-sized—as shown below—and the ticket will probably get you enough food for a light meal. Some people complain that the price of tickets is steep relative to the cost of a large plate of noodles at a Chinese restaurant, but I don't think they realize that this is a charity event with proceeds going to the Chinatown Community Development Center and the North Beach Merchants Association.

| Left. Chinatown samples: salted fish chow fun from Four Seas; Shanghai noodles with scallion and pork from Bund Shanghai; Singapore curry stick noodles from New Sun Hong Kong | Right. North Beach samples: pacchera pasta with prosciutto and truffle from È Tutto Qua; tagliatelle with pork rib, peperoncino, and truffle oil from Vicoletto; gnochetti with garlic, gorgonzola, and toasted pine nuts from The Stinking Rose |

It was interesting to see how each neighborhood went about organizing their part of the event. The Chinatown side had a good variety of very simple Asian noodle dishes available, with booths manned by students and volunteers from the community and a free hot tea tasting booth. On the North Beach side, it seemed like there was a much stronger presence of restaurant proprietors, many booths were decorated with fresh produce or jarred things for sale, and the dishes had more complex flavors like truffle oil and wild boar. Everything tasted yummy and very fresh for a street fair. My favorite was the prosciutto and truffle pasta from È Tutto Qua; despite it being the least pretty, the rich truffle flavor made it the most delicious.

Nick was hoping to see some sort of well-choreographed West Side Story dance-fight take place between the two neighborhoods but no such thing occurred.

| Photo Credit: Me. |